How I set up my own Mastodon server and custom display name
2023.01.25
I was curious about Mastodon but only interested in joining if I could have the name I wanted: @Aubrie@aubrielee.com. The promise of open source is control and customizability, is it not?
I already had a personal website at aubrielee.com hosted on GitHub Pages. Rather than rent a new domain, I set up my own Mastodon instance on a subdomain, verse.aubrielee.com. Then, I changed my display name from Aubrie@verse.aubrielee.com to Aubrie@aubrielee.com by setting up HTTP redirects and editing my Mastodon .env file.
I’ll describe my process in more detail in case it helps anyone else.
requirements
I wanted to:
- Keep my GitHub Pages site going on aubrielee.com
- Host my Mastodon instance on a subdomain of aubrielee.com
- Change my display name to a custom domain (@aubrielee.com instead of @subdomain.aubrielee.com)
process
The general stages were:
- Set up hosting
- Connect my domain
- Set up Mastodon
- Fix my admin privileges
- Set up a custom domain
setting up hosting
For hosting, I chose DigitalOcean because of its reputation. Setting up my Mastodon instance required creating a new Droplet.
To create the Droplet:
- Create DigitalOcean account (here’s my referral link if you care to use it).
- Begin a new Droplet.
- Choose a region and datacenter.
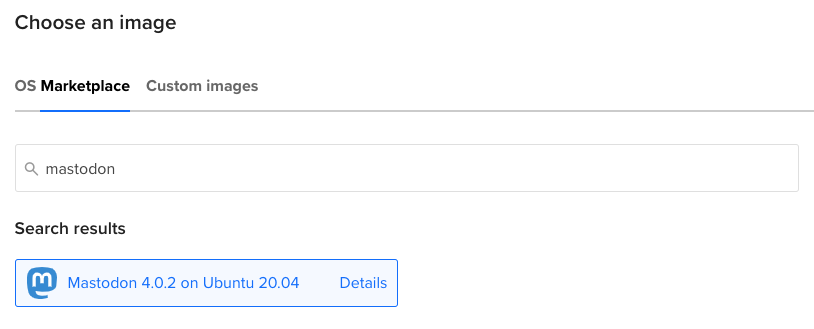
- Go to Marketplace, search for Mastodon, and choose it.
- Choose size. I chose the most basic option, as I’ll be the only user on my instance. For “Additional Storage”, I didn’t opt in.
- Choose authentication method. I read Mastodon requires SSH, not password. I set up an SSH key on my Mac via Terminal.
- For the final settings, I opted into monitoring but not backups. I didn’t change the hostname or project from the defaults.
- Choose Create Droplet. The Droplet will take a few minutes to be ready.
linking a subdomain
I had aubrielee.com and wanted to set up on verse.aubrielee.com rather than rent another domain and fragment my domain architecture. This guide assumes you already have a domain—e.g., something.com—and you want to set up your Mastodon server on a subdomain—e.g., social.something.com.
- Go to your domain name provider or registrar. Mine is Google Domains.
- Find your DNS settings and resource records.
- Create a new record A record for social.something.com. Set type to A and host name to your chosen subdomain—e.g., just social. I didn’t change the default TTL.
- Go back to DigitalOcean. When your Droplet is ready, copy its IP address.
- Paste the IP address into the A record.
going through the mastodon setup wizard
Now that I had the Droplet and domain connected, I could go through the setup of the Mastodon app on the Droplet.
- Open a command line. For me, this was via Terminal on Mac.
- SSH into the Droplet by typing ssh root@[your Droplet’s IP address] and hitting enter. Example results:
Users-iMac:~ user$ ssh root@##.###.###.###
The authenticity of host '##.###.###.### (##.###.###.###)' can't be established.
ECDSA key fingerprint is […].
Are you sure you want to continue connecting (yes/no)? yes
Warning: Permanently added ##.###.###.###' (ECDSA) to the list of known hosts.
Enter passphrase for key '/Users/user/.ssh/id_rsa':
- Enter your SSH passphrase.
- Go through the wizard. For example:
Welcome to the Mastodon first-time setup!
Domain name: social.something.com
Do you want to store user-uploaded files on the cloud? No
- Set up SMTP if you’d like. I skipped it (I actually tried a test email to see what would happen; it failed):
SMTP server: localhost SMTP port: 587 SMTP username: SMTP password: SMTP authentication: plain SMTP OpenSSL verify mode: none E-mail address to send e-mails "from": Mastodon <notifications@social.something.com> Send a test e-mail with this configuration right now? no - Create an admin account. For example:
It is time to create an admin account that you'll be able to use from the browser!
Username: Name
E-mail: name@something.com
You can login with the password: […]
The web interface should be momentarily accessible via https://social.something.com/
- Save that password somewhere.
- Go through the final SSL notification items: enter an email address and choose whether to donate to EFF. When SSL and symlinks are ready, the wizard will say Setup is complete! Login at https://social.something.com.
- Visit your social.something.com and log in with the email and password from action 19.
- You can set a password different from the generated one.
- Go to Preferences and verify you have Administration privileges. You can also verify you can visit https:/social.something.com/admin/dashboard without error:

fixing my admin privileges
When I logged into my instance, I didn’t have an Administration tab. I changed my account role to Owner by entering my Mastodon instance via Terminal and using a tootctl command.
Instead of using Terminal, you can also use the console in DigitalOcean near the top right of the web interface of your Droplet. This console is now my preferred way of entering my instance, rather than SSHing in on my computer.
- Install Ruby at the Droplet root. I’m not sure if this was necessary, but I was following a GitHub thread.
root@hostname:~# apt install ruby ruby-bundler
- Sudo into the Mastodon app.
root@hostname:~# sudo su mastodon
- Change to the home directory, then to the live/bin directory.
mastodon@hostname:/root$ cd ~
mastodon@hostname:~$ cd live/bin/
- Use tootctl to change the role of your Name account to Owner. (You set Name in action 19.)
mastodon@hostname:~/live/bin$ RAILS_ENV=production ./tootctl accounts modify Name --role Owner
Now you should have full admin privileges.
setting up a custom domain
Setting up a custom domain allows your display name to be @Name@something.com instead of @Name@social.something.com. (I believe, theoretically, the display domain could be arbitrary, e.g., @Name@anythingelse.com.) To display a custom domain, I set HTML redirects in GitHub Pages for three web resources: host-meta, nodeinfo, and webfinger. I also had to edit my Mastodon .env file.
-
Curl host-meta from social.something.com
Users-iMac:~ user$ curl -k https://social.something.com/.well-known/host-meta
-
Copy the resulting XML and put it in a new GitHub Pages file called:
githubpagesusername.github.io/.well-known/host-meta
-
Do the same for nodeinfo. Curl nodeinfo from social.something.com
Users-iMac:~ user$ curl -k https://social.something.com/.well-known/nodeinfo
-
Copy the resulting JSON and put it in a new GitHub Pages file called:
githubpagesusername.github.io/.well-known/nodeinfo
-
Do the same for webfinger, curling and inserting into a file.
Users-iMac:~ user$ curl -k https://social.something.com/.well-known/webfinger?resource=acct:name@social.something.com
githubpagesusername.github.io/.well-known/webfinger
-
In your Mastodon instance, change to the /home/mastodon/live directory:
mastodon@hostname:~$ cd /home/mastodon/live
-
Edit the .env.production file with a text editor like vim or nano:
mastodon@hostname:~/live$ vim .env.production
-
Add this to the top of the file, as specified by Mastodon documentation, and write the file.
LOCAL_DOMAIN=something.com
WEB_DOMAIN=social.something.com
-
Exit back to the root. If you don’t, as I didn’t at first, you’ll be asked for a password until you get “3 incorrect password attempts” when trying the next sudo actions.
mastodon@hostname:~/live$ exit
-
Restart Mastodon services with these commands:
root@hostname:~# systemctl restart mastodon-web
root@hostname:~# systemctl restart mastodon-streaming
root@hostname:~# systemctl restart mastodon-sidekiq
Now everything should be ready! Post, boost, follow at will. Follow me, even: https://verse.aubrielee.com/@Aubrie.
Thank you to the people who saved me with their advice. Here are some resources I consulted along the way:
- No one can find my account even via profile URL · Discussion #23047 · mastodon/mastodon · GitHub
- Setting up a Mastodon Server at DigitalOcean
- How to Set Up Your Own Mastodon Instance
- Admin CLI doesn’t work out of the box for 1-click Digital Ocean installs · Discussion #18137 · mastodon/mastodon · GitHub
- Mastodon usernames different from the domain used for installation - Masto.host
- Configuring your environment - Mastodon documentation
- mastodon-documentation/Serving_a_different_domain.md at master
2024.02.28 Update:
For a long time, I’ve been wanting to embed an excerpt of my timeline into this website. I’ve now done so at https://aubrielee.com/more using i.j’s Mastodon embed timeline widget. Many thanks to i.j for being so kind and helpful in getting it set up!